How to create an Email and SMS Campaign
How to create an Email and SMS Campaign in ToolDesk.
Head to the Campaigns tab in ToolDesk to get started.
Creating a Campaign in 4 Steps
- Setup Campaign
- Create Audience
- Create Content
- Review & Send Campaign
Setup Campaign
- Give your Campaign a name
- Choose between a SMS (text message) and Email Campaign
- Click “Continue”
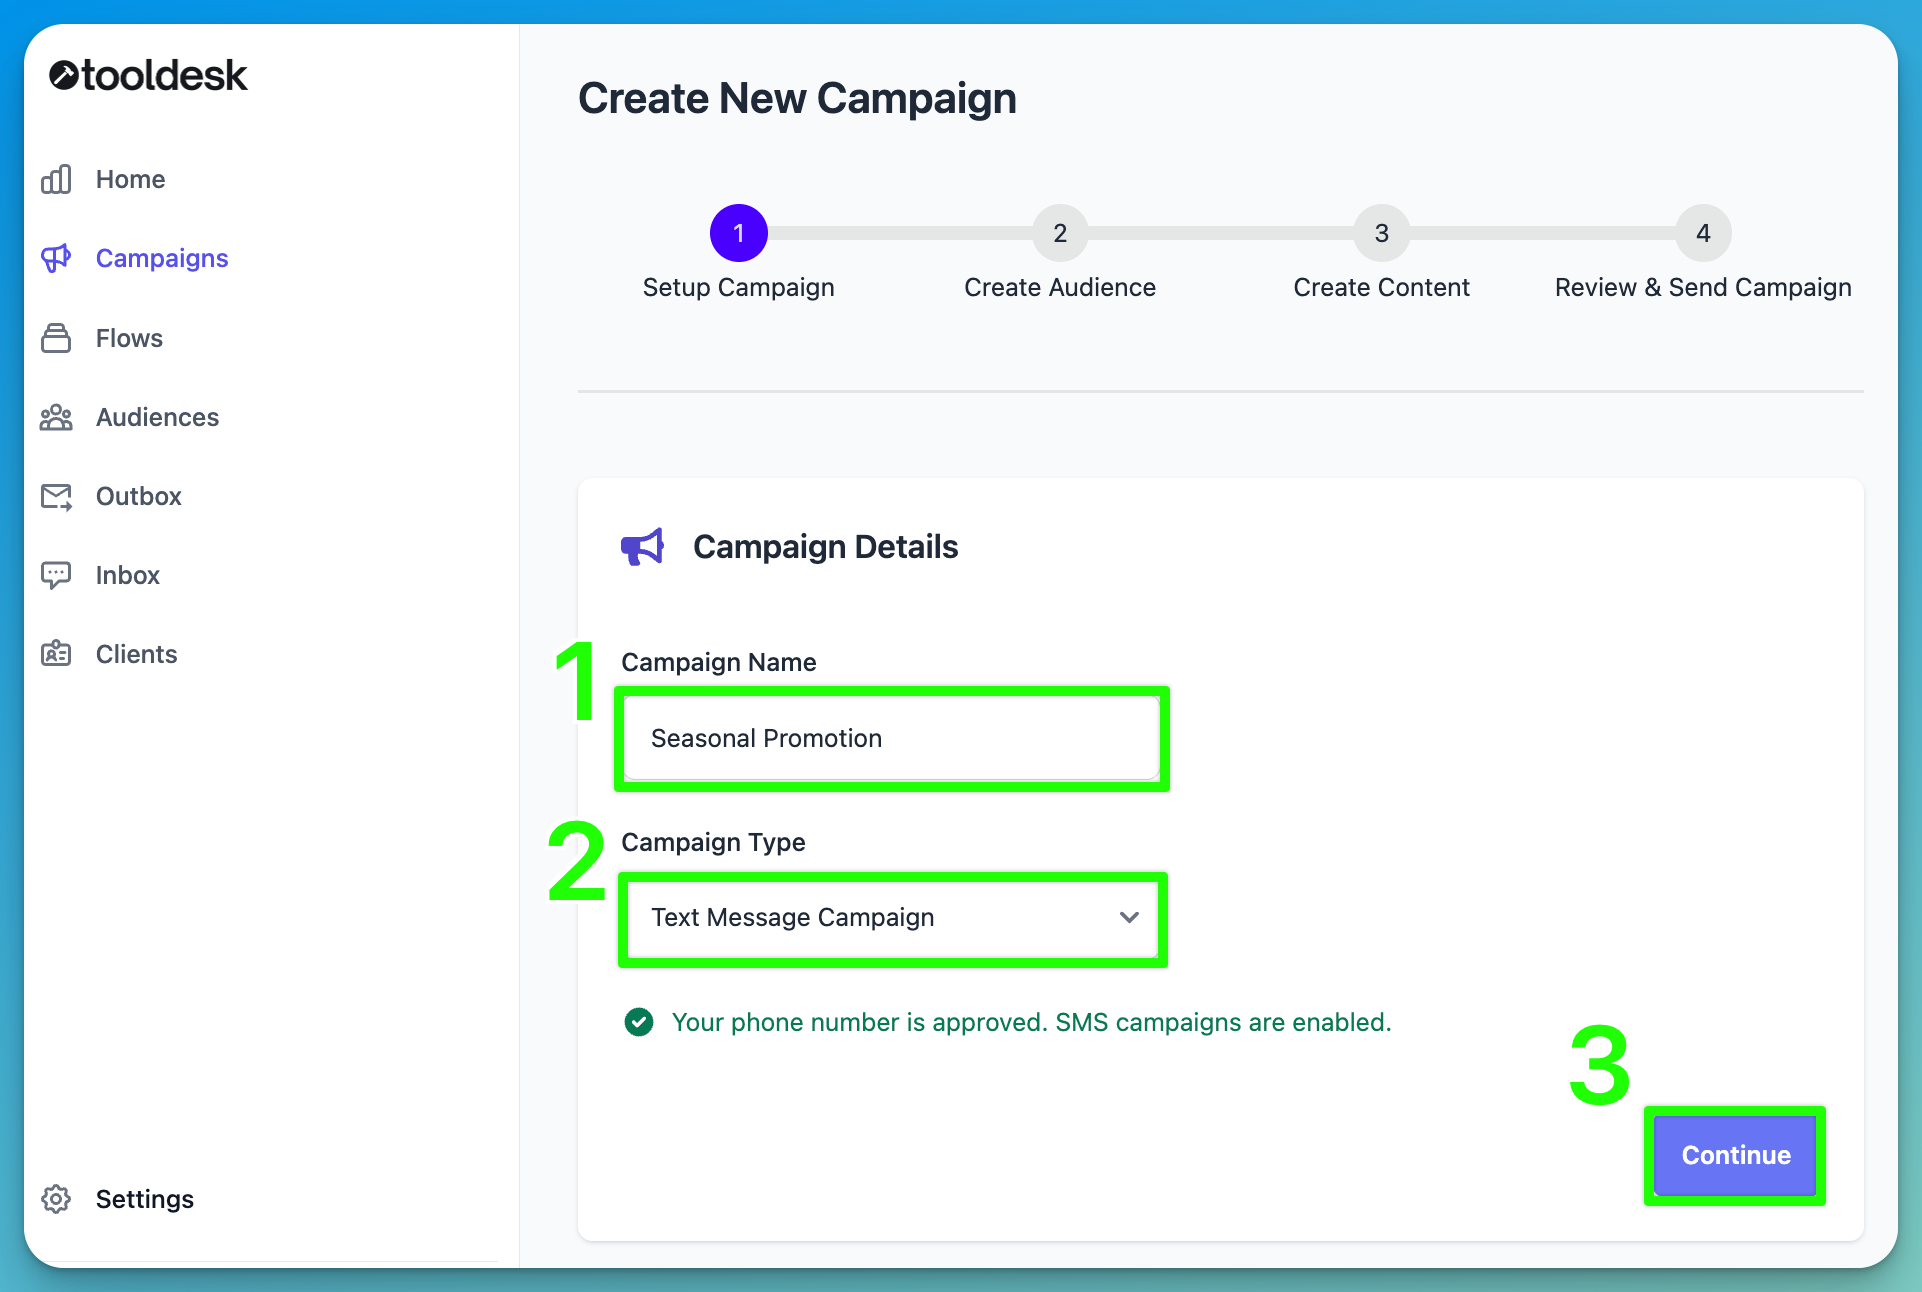
If you see a message that says “Your custom domain is not validated. Email campaigns are disabled.”, please set up your custom sending email.
If you see a message that says “Your phone number is pending approval. You will not be able to send SMS campaigns until it is approved.”, please submit your phone number application.
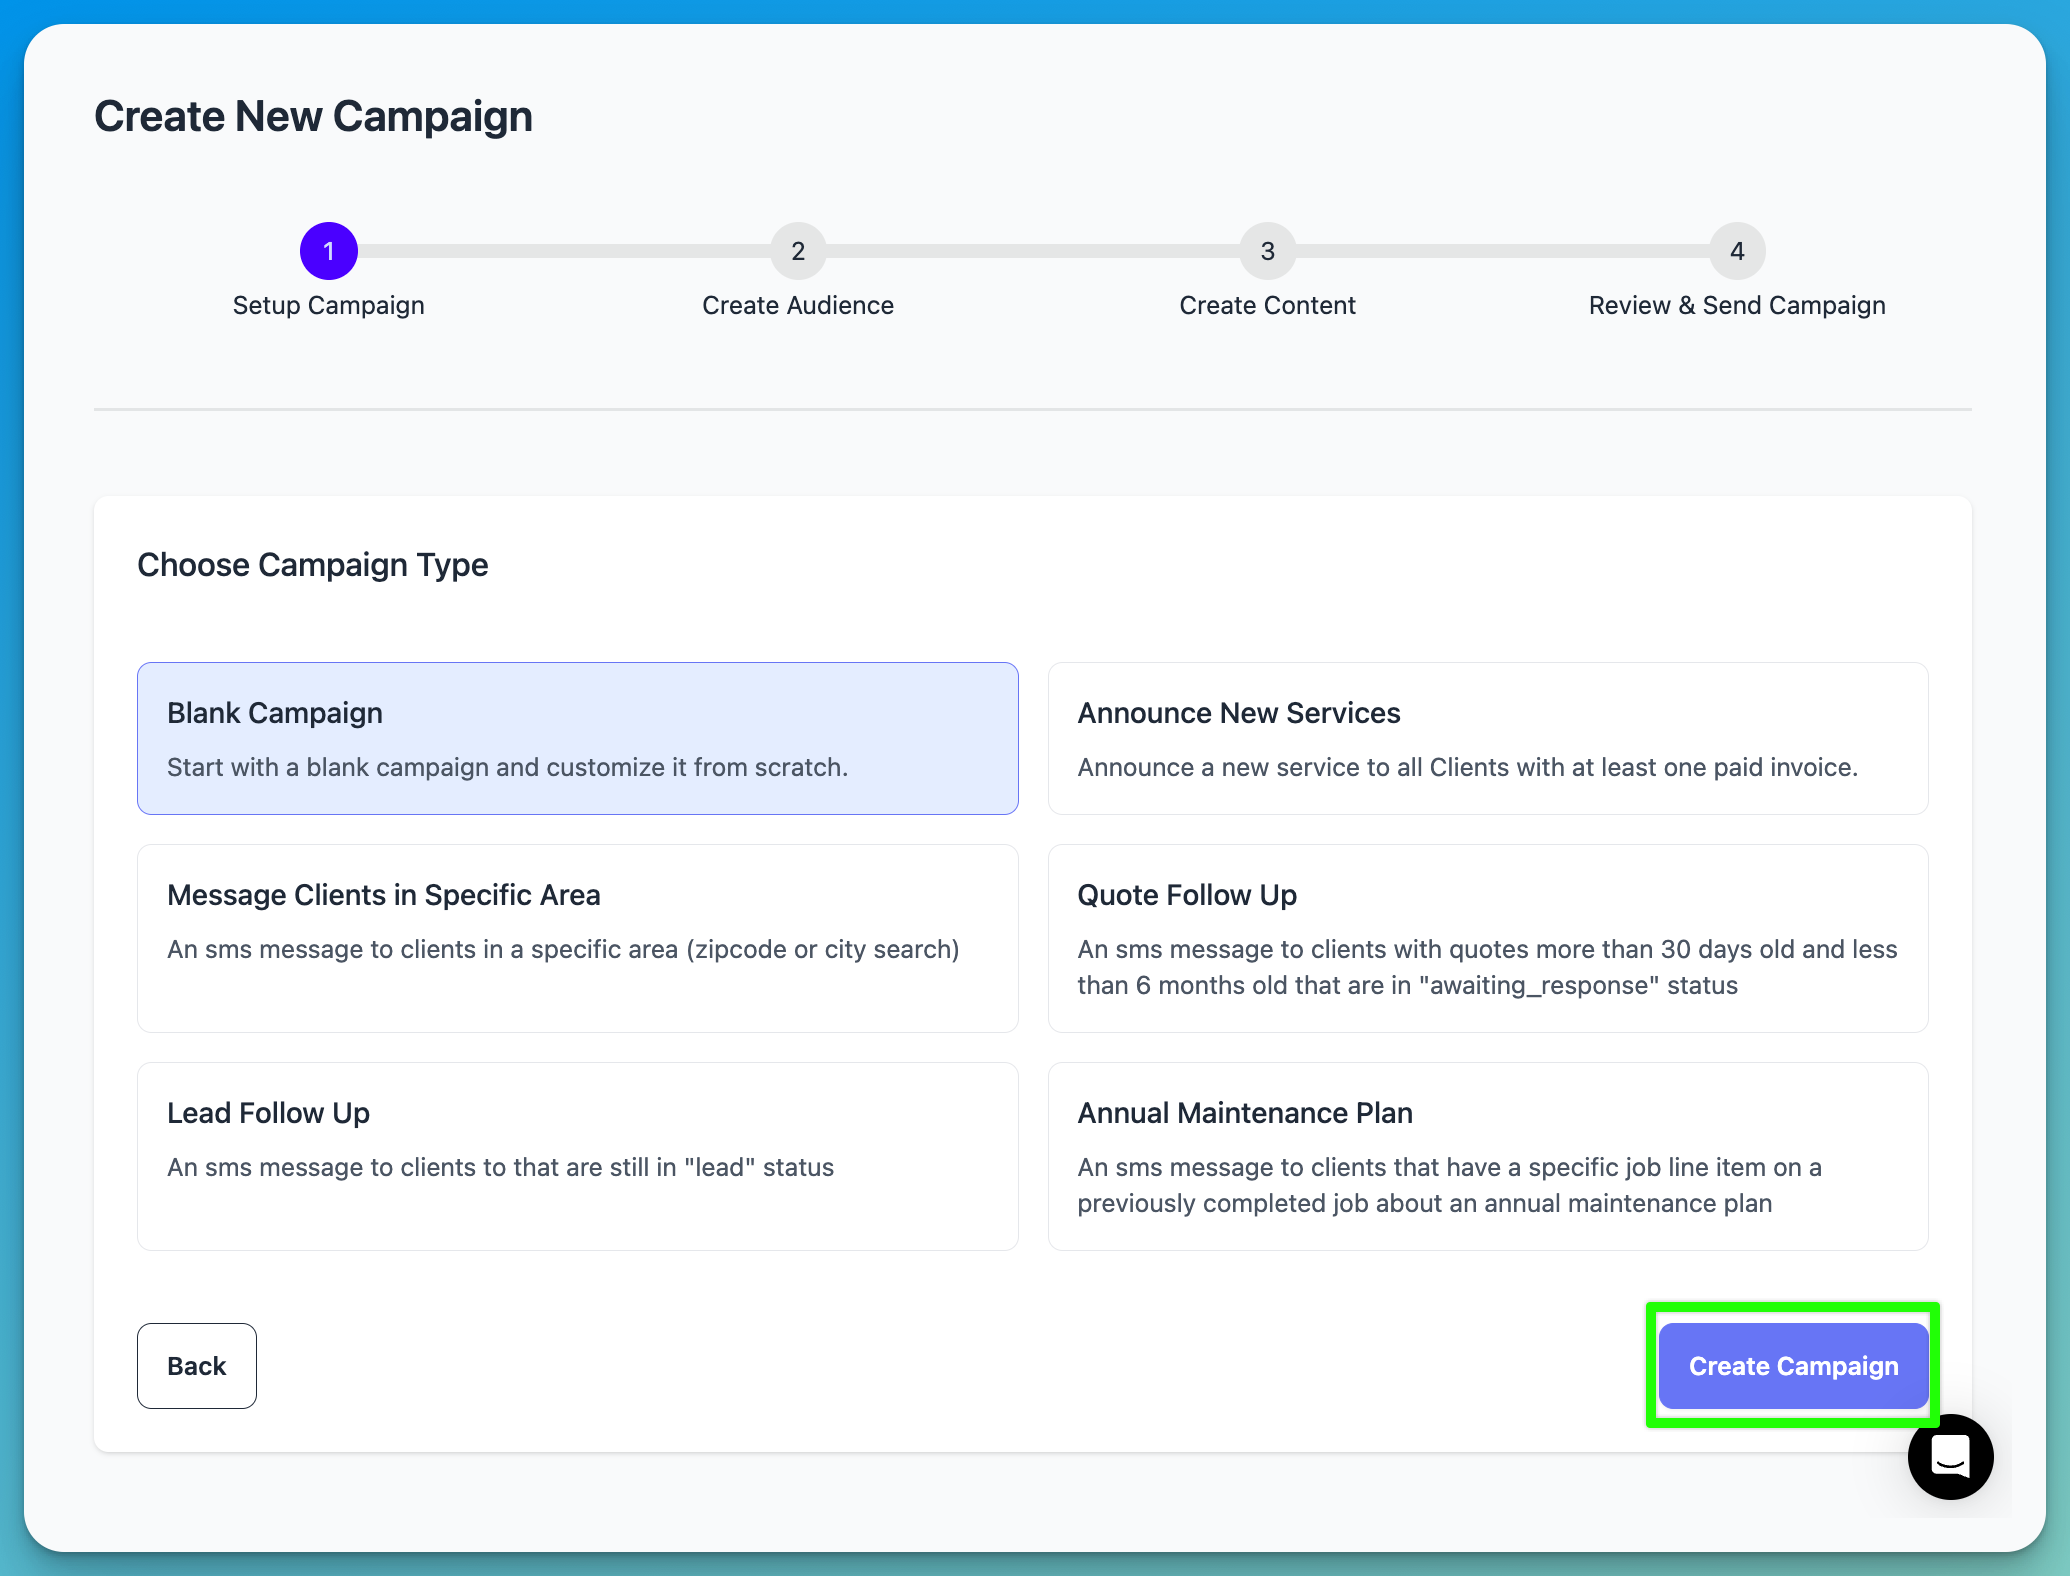
- Choose from a pre-built campaign or start from scratch from a Blank Campaign
- Pre-built Campaigns include a filtered list of Clients a.k.a Audience and prewritten email or text message
- Click “Create Campaign”
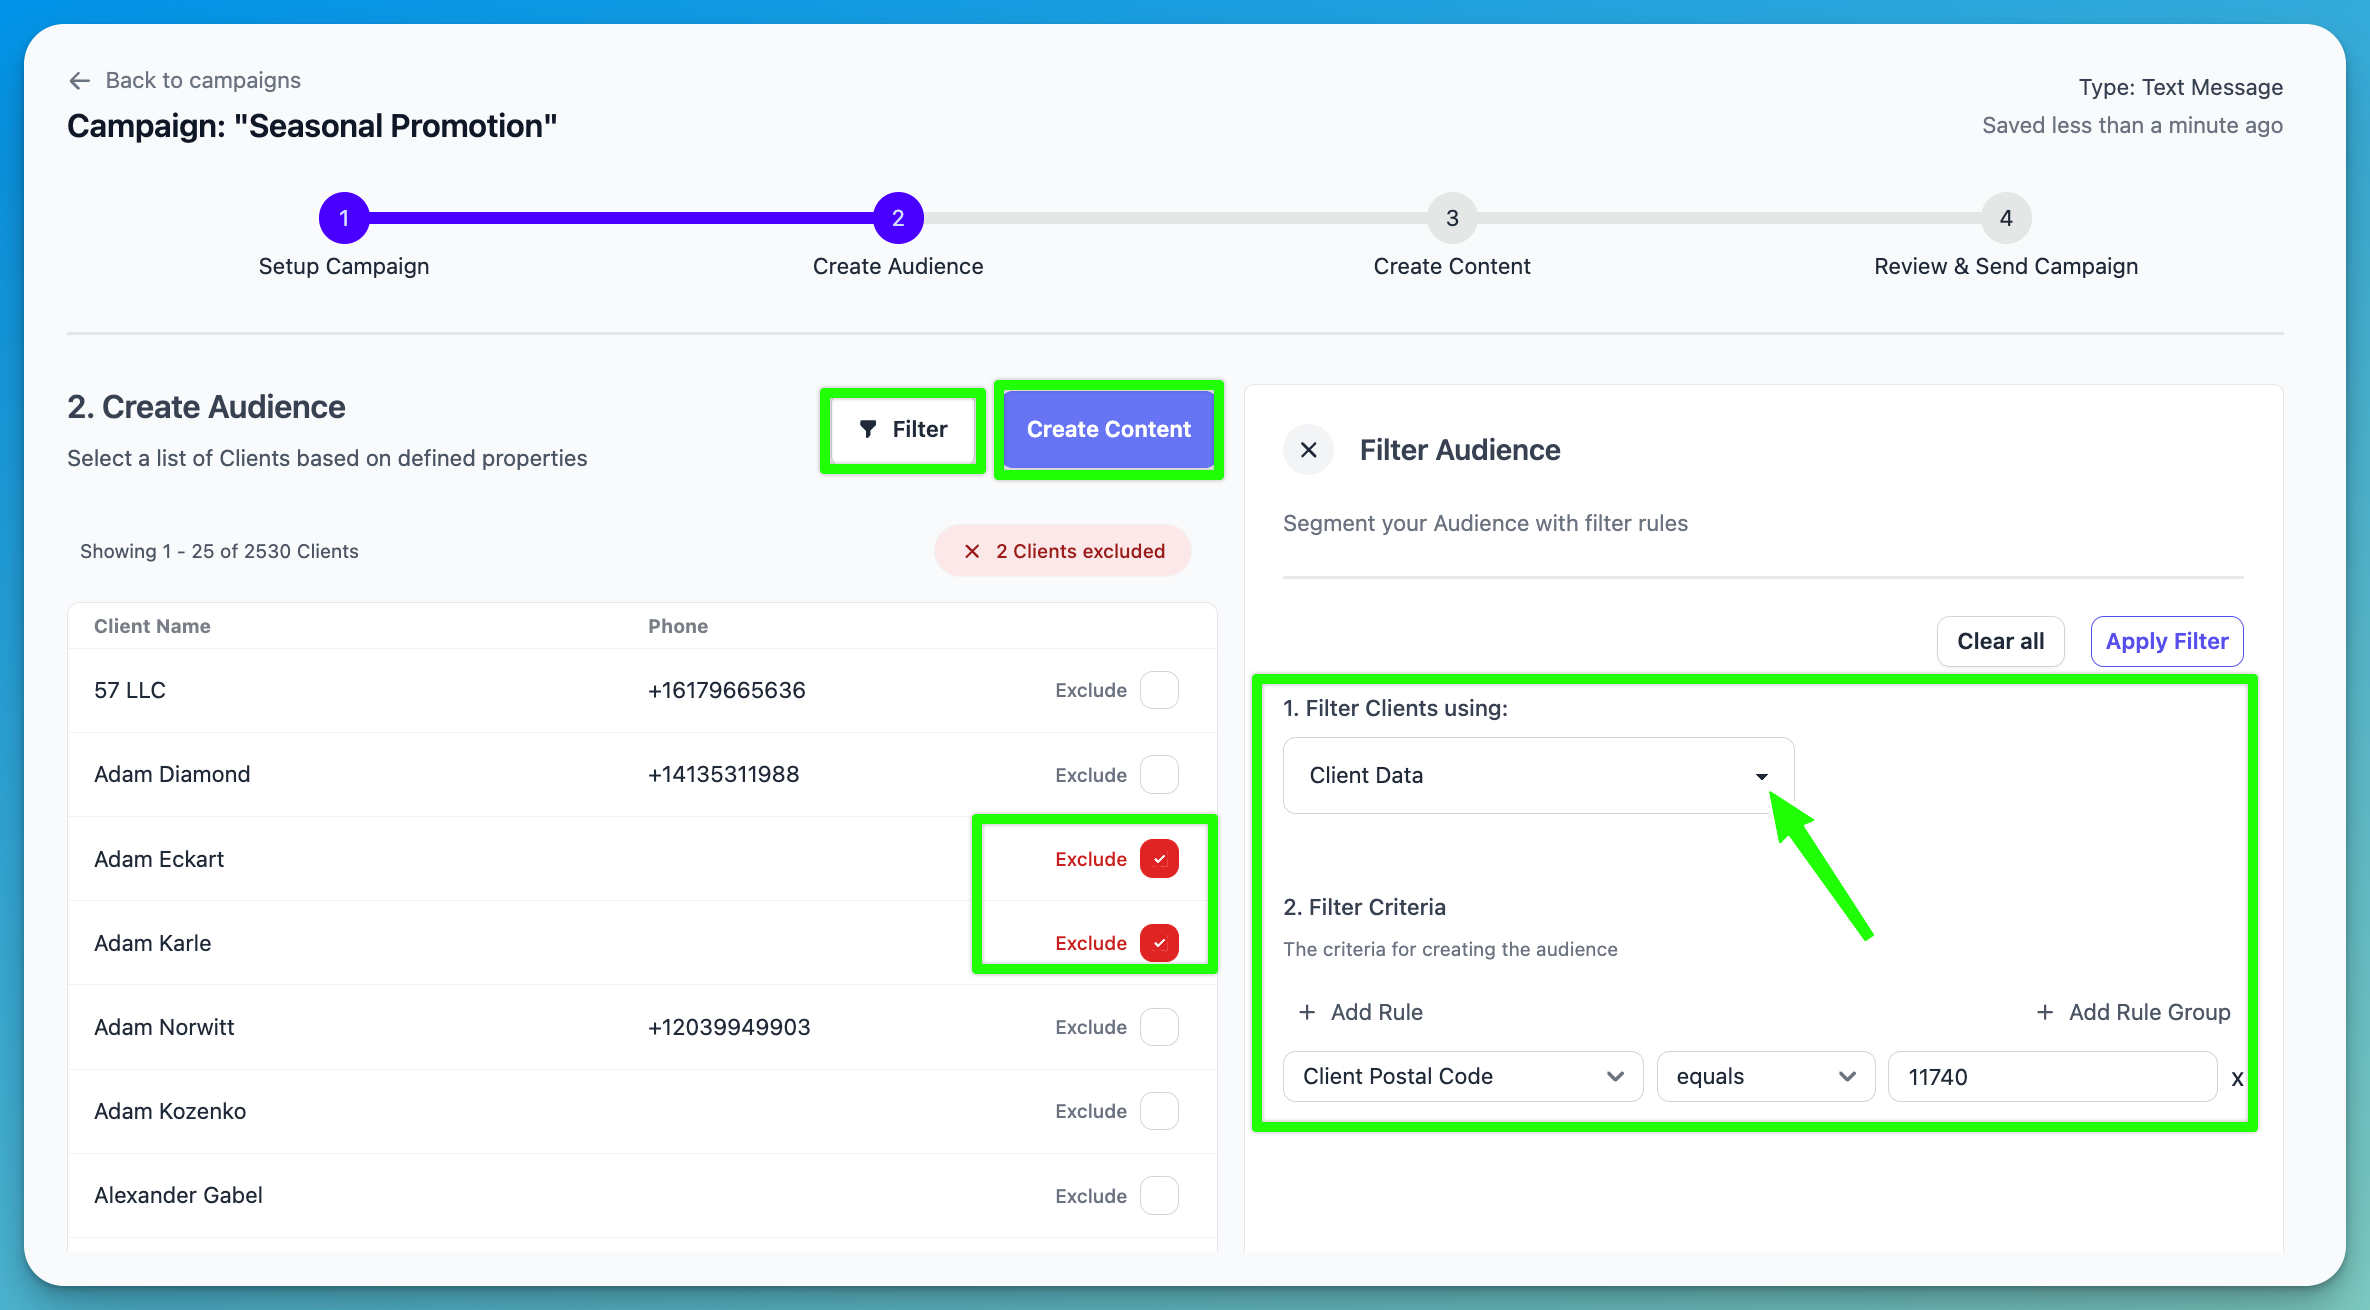
Create Audience
- If you selected a Campaign Template, you’ll have a pre-filtered Audience of your Clients that you can leave as-is, or modify to meet your goals.
- If you selected Blank Campaign, you can create a Audience with filters or choose to send a message to all of your Clients. How to use Filters to build Audiences
- You can also manually exclude Clients from a Campaign by using the Exclude checkbox.
- Once your Audience is set, click “Create Content”.
Create Content
Creating Text Message Campaigns
Tips for great text message campaigns
- Start the message with your company name.
- Less is more. Keep the message short.
- Use one clear Call-To-Action (e.g. Call now to book)
- Longer messages will use more credits. How SMS Credits Work
- Type out your message in the composition window
- Use Client and ToolDesk Variables to personalize your message
- Use the preview window to see how the message will look to your Clients
- When your ready, click “Review Campaign.”
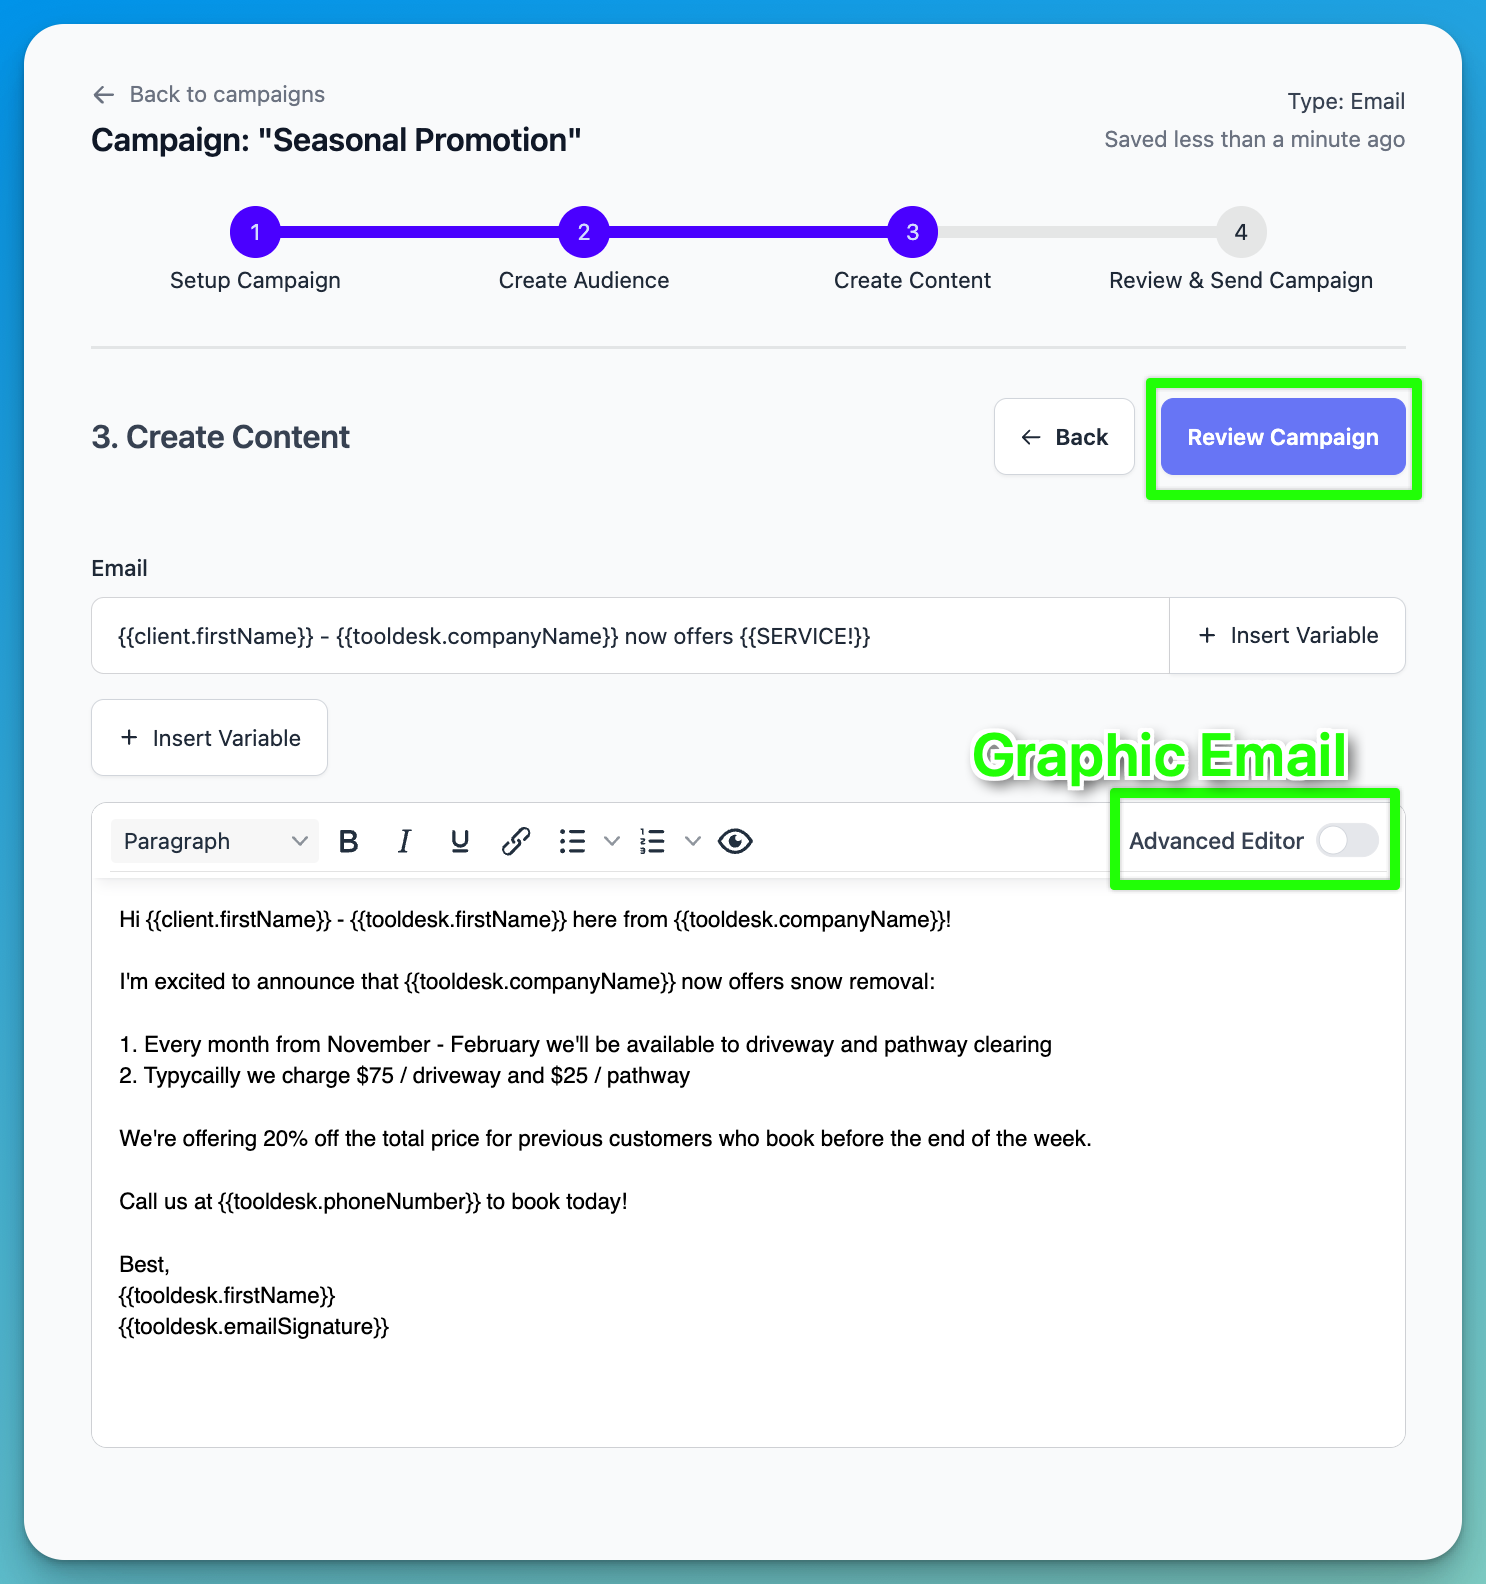
Creating Email Campaigns
- When creating an Email Campaign, you have two options:
- Plain Text: a simple text-only email like you typically send via Gmail or Outlook
- Graphic: a designed email with graphics like you might send in MailChimp 1. You can access the graphic email designer by clicking “Advanced Editor”
- Once you pick your email type, write out your message in the composition window
- Use Client and ToolDesk Variables to personalize your message
- Use the preview button to see how the message will look to your Clients
- When your ready, click “Review Campaign.”
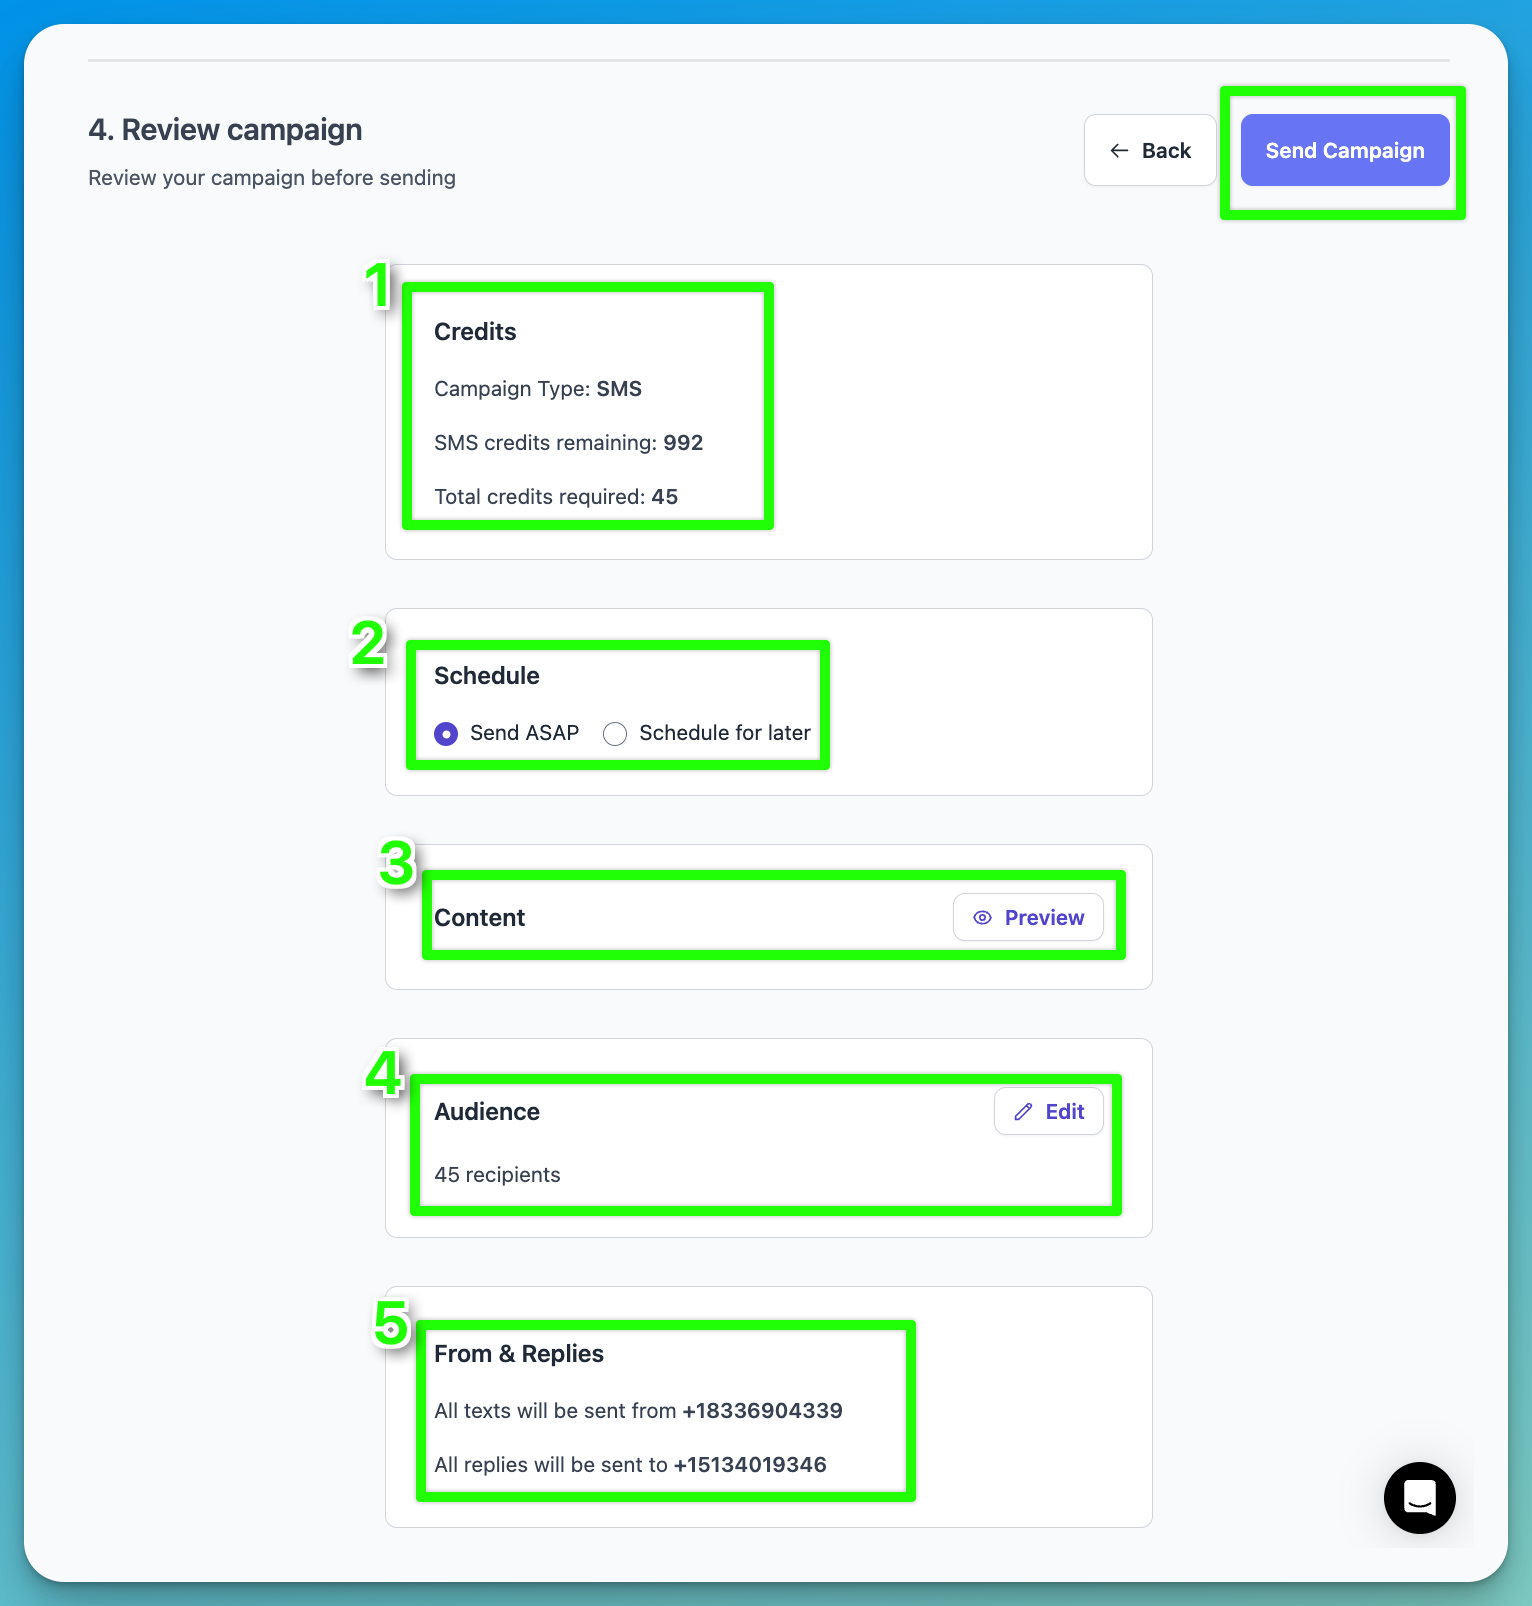
Review & Send Campaign
Review the information about your campaign and click “Send Campaign” to send
- Credits
- Campaign Type: SMS or Email
- Credits Remaining: SMS or Email credits left this billing cycle
- Total credits required: how many credits this campaign will cost 1. Total Cost = # of credits per message * # of Clients in Campaign
- Schedule
- Send the campaign now
- Schedule the campaign to send later
- Content
- Preview the SMS or email
- Audience
- # of Clients in the campaign given the filters
- From & Replies
- The phone # or email address sending the message
- The phone # of email address receiving any replies