DNS Setup for Custom Sending Email
How to add records to your domain so you can emails from the email of your choice through ToolDesk.
Why should I set up a custom sending email?
By setting up a custom sending email, which will typically be your main business email like “[email protected]”, you will create a personal touch and ensure that your Clients are clear on who they are receiving ToolDesk emails from.
How do I set up my custom sending email?
Setting up your custom sending email includes three key steps:
- Configure the following data in ToolDesk:
- “Send replies to”
- “From name”
- “Send emails from”
- Add three records to your domain (e.g. www.bryanslawncare.com)
- Verify that these three records were correctly added to your domain
Configure data in ToolDesk
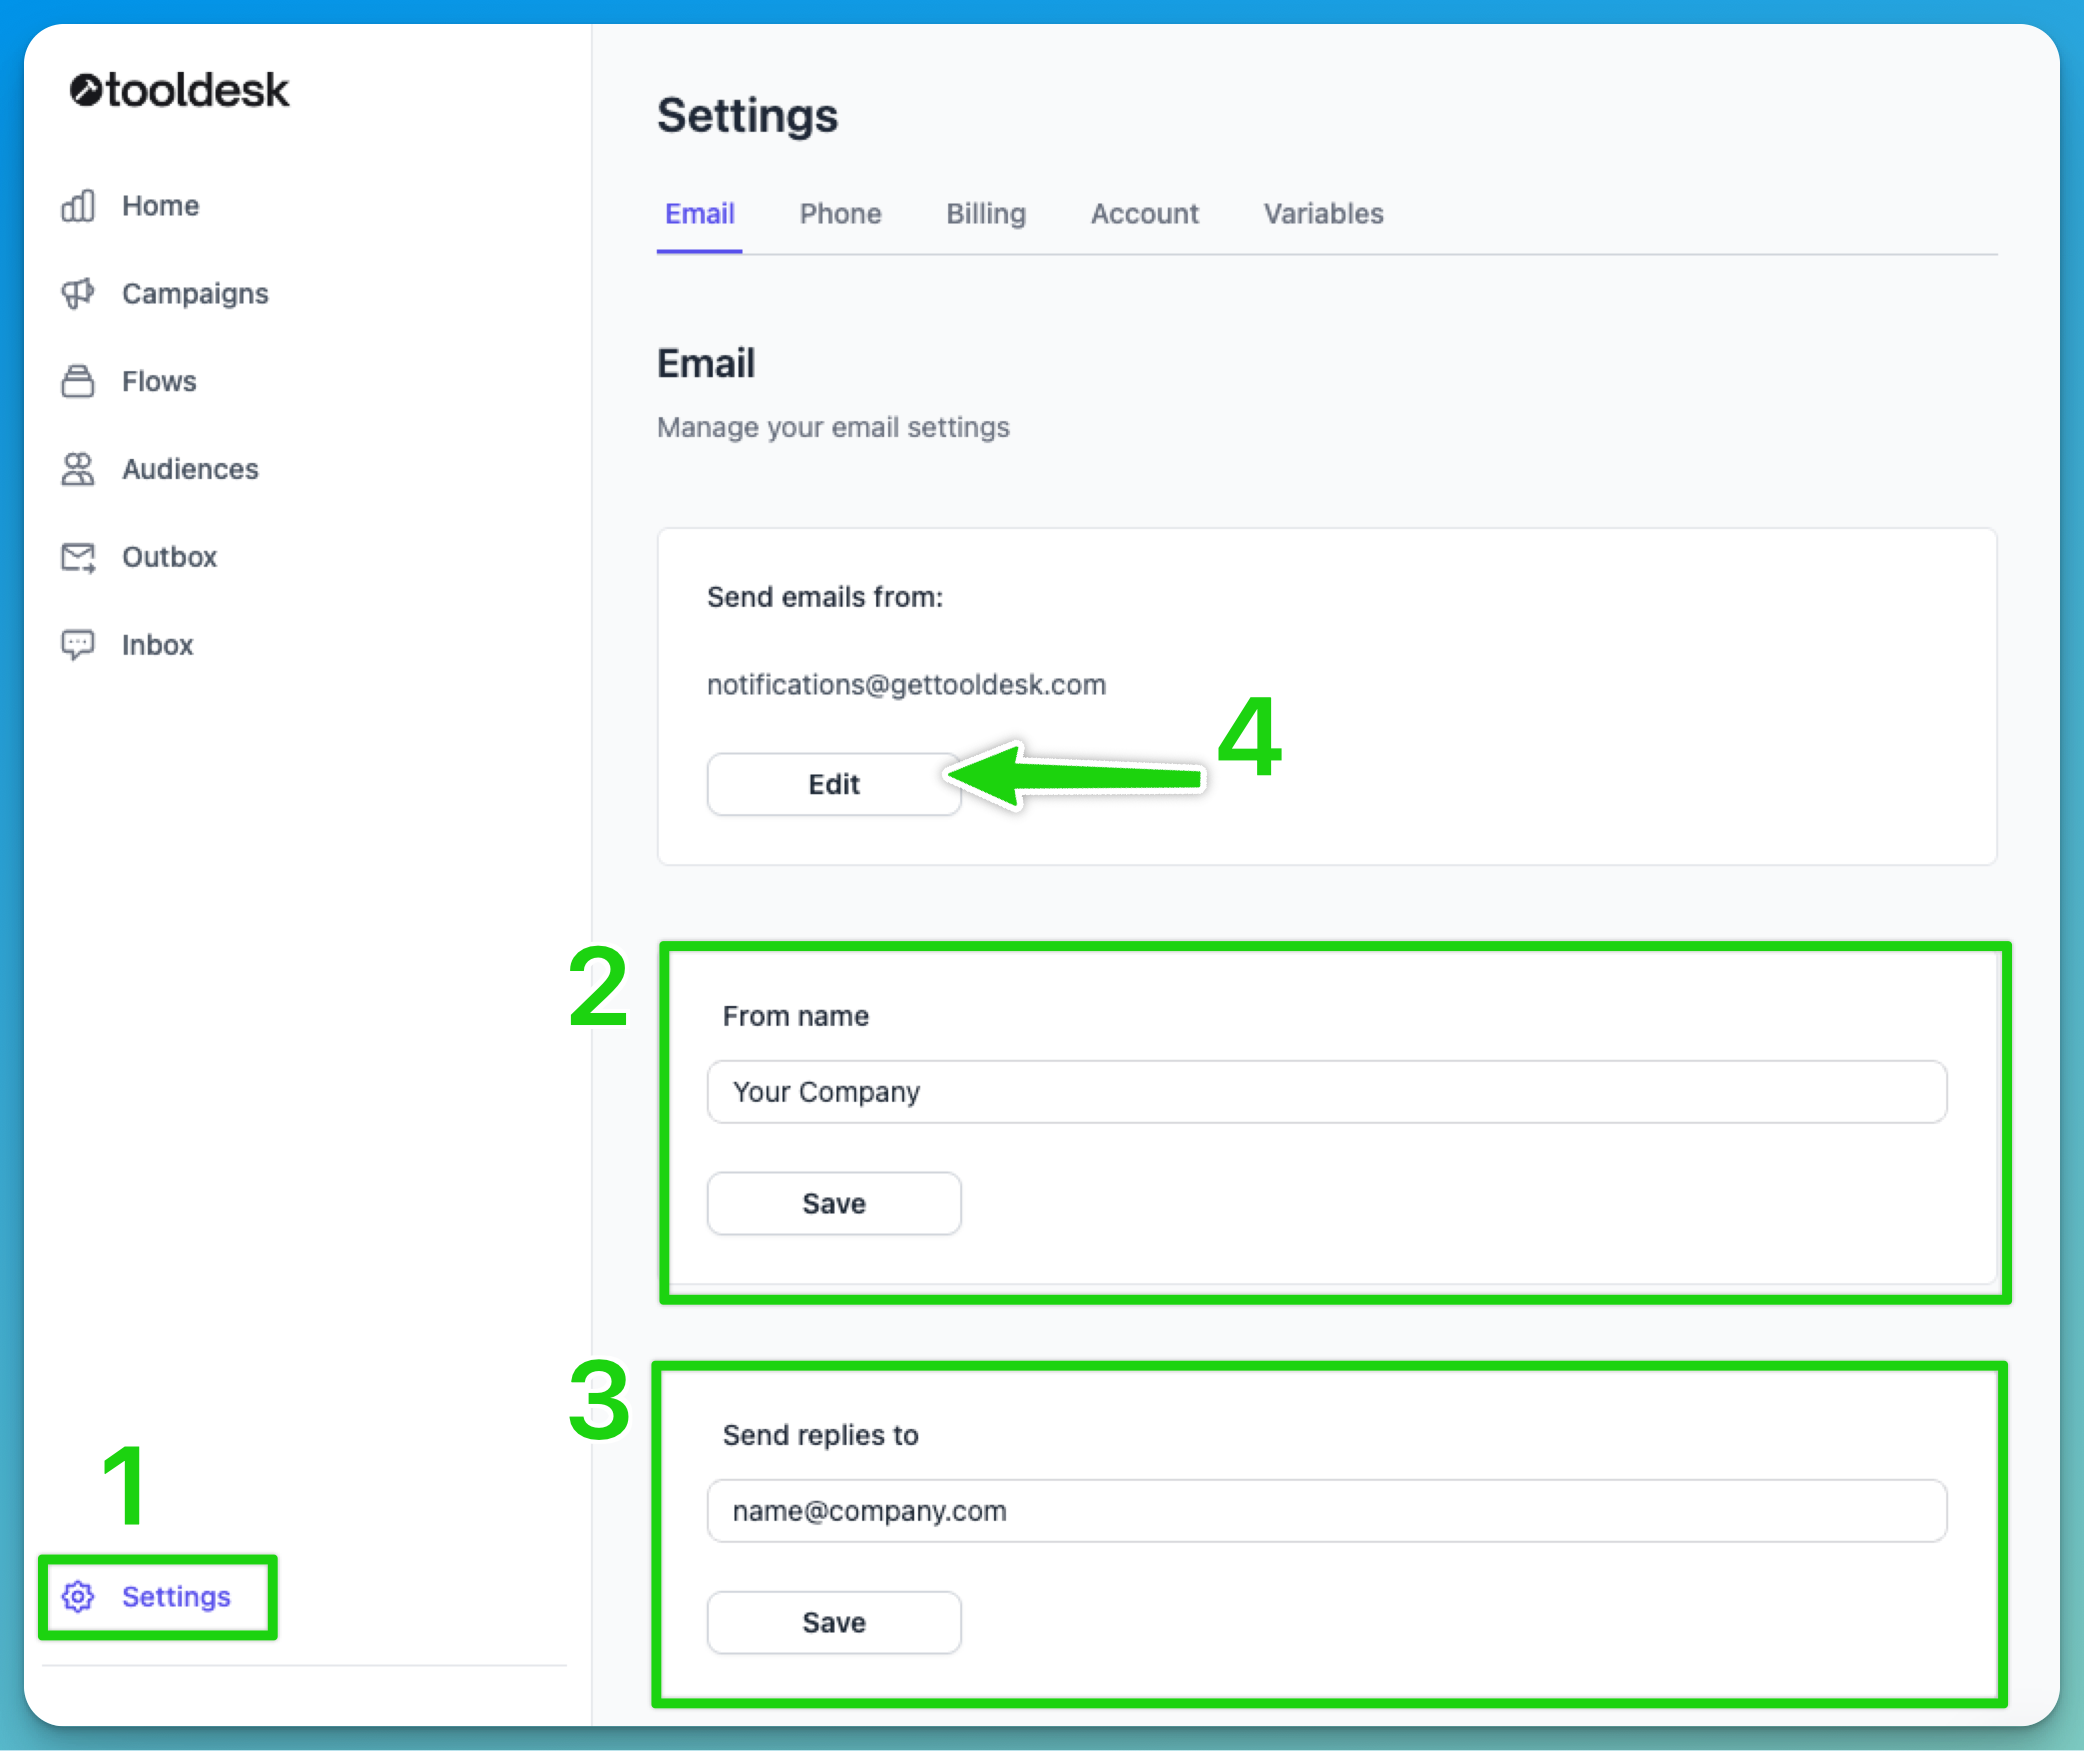
- Head to Settings in ToolDesk
- Set the email you want to receive email replies to
- Set the company or person name you want to have the emails come from
- Click “Edit” on the “Send emails from:”
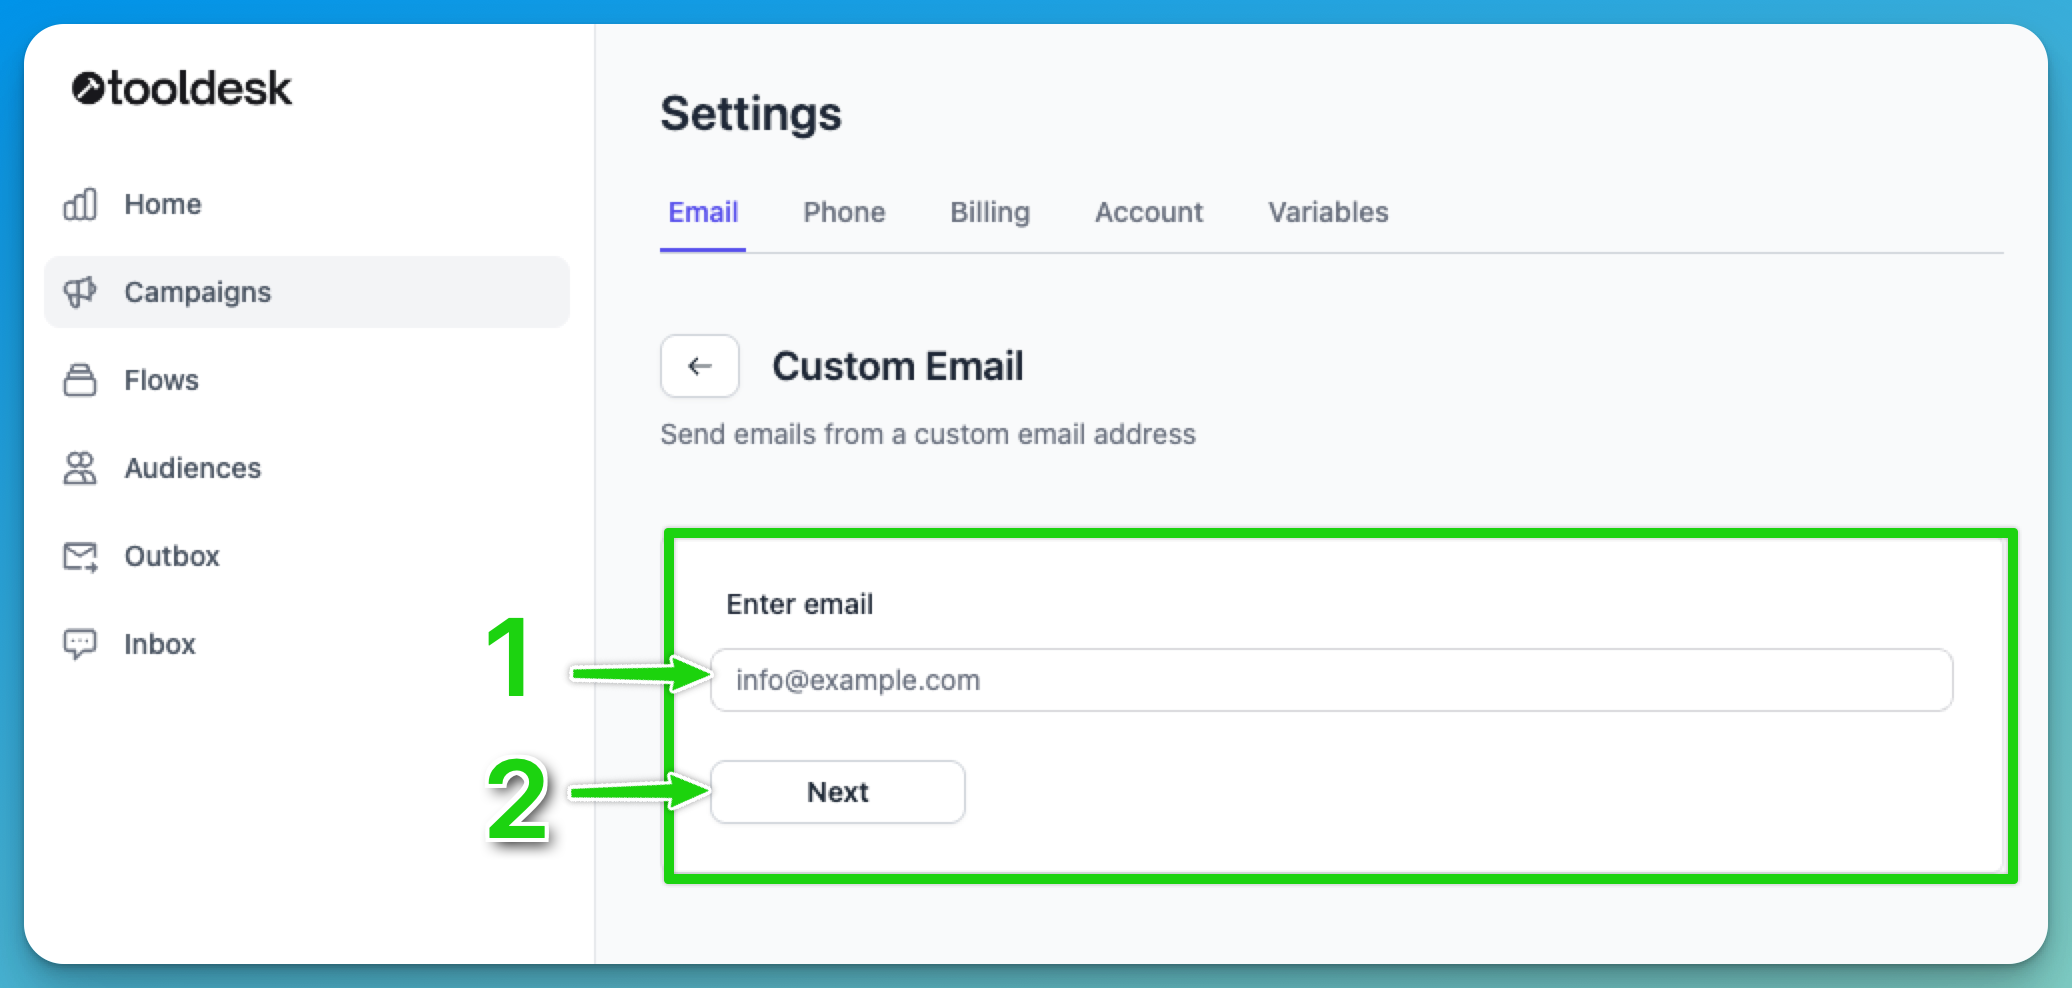
- Enter the email you want your ToolDesk emails to come from.
- Click “Next”
Add records to your domain
At this step you have two options:
- Send instructions to whoever manages your website
- Add the records to your domain yourself
Send instructions
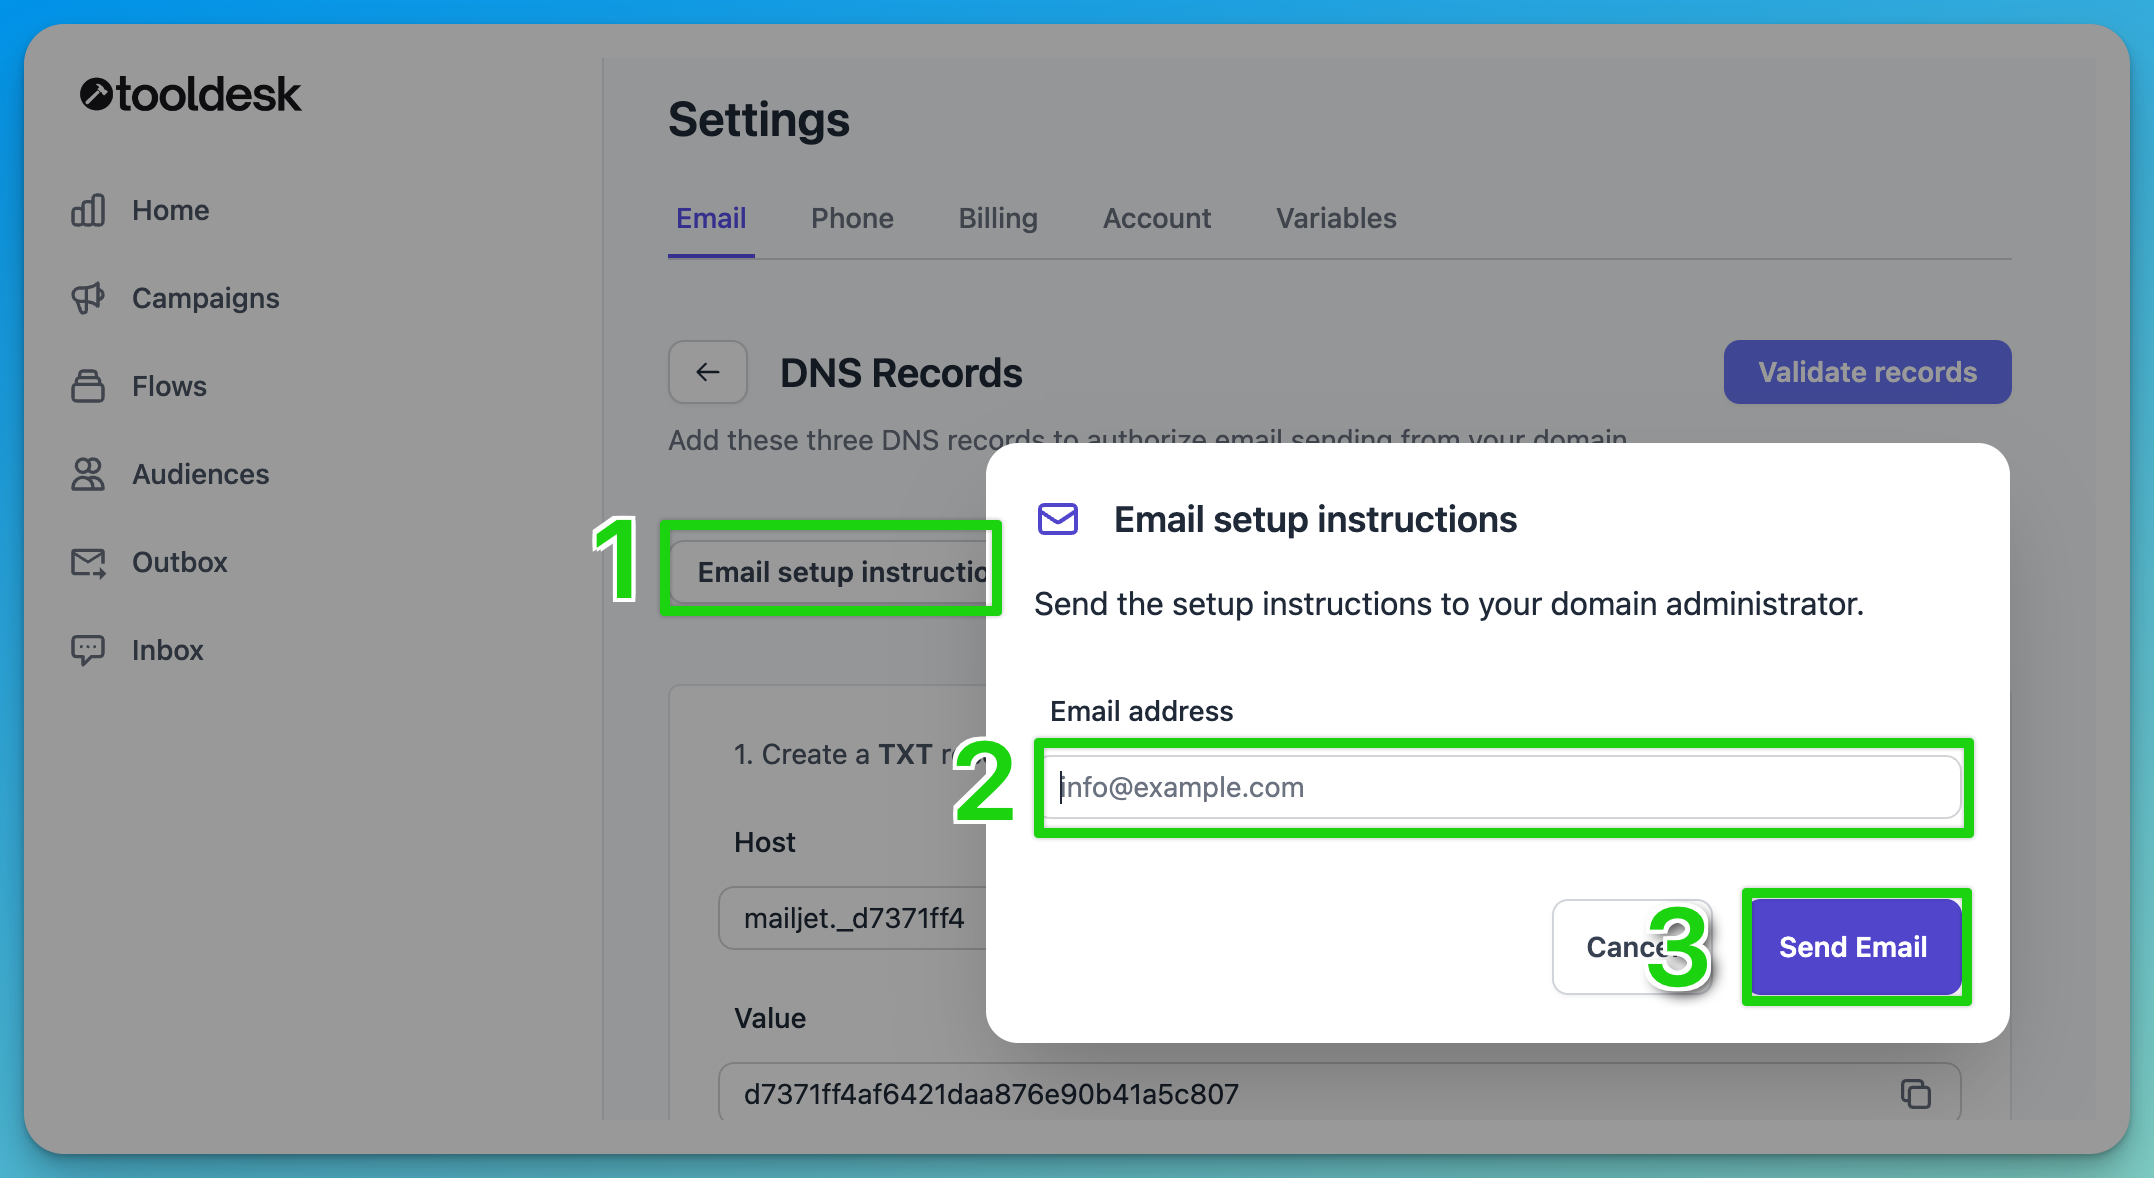
- Click “Email setup instructions”
- Enter the email address of whoever manages your website
- Click “Send email”
Add records yourself
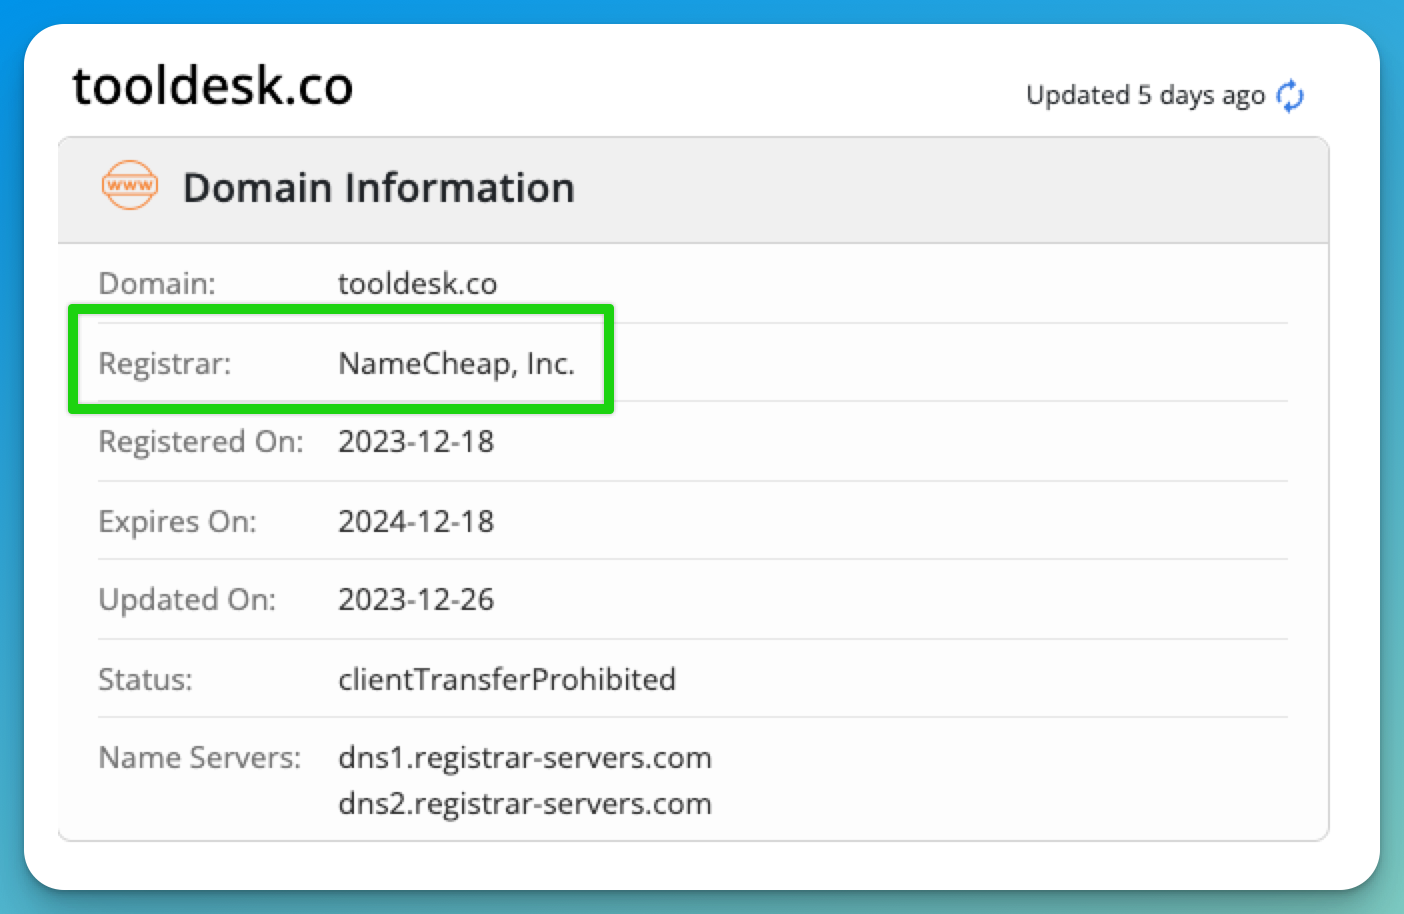
- Go to WhoIs Domain Lookup
- Enter your domain name and click “Search”

“Registar” is where your domain is hosted and will likely be one of the above options.
- Login to wherever your domain is hosted such as:
- GoDaddy
- Bluehost
- Namecheap
- Squarespace
- Wix
- HostGator
- Once in your domain management system, go to your domain and look for “Manage DNS”, “Advanced DNS”, or “DNS Settings”. NameCheap and GoDaddy examples below:

- From there, add your three domain records by copying and pasting the values from ToolDesk as New Records on your domain
- You may already have a record on your domain that starts with “v=spf1”, in which case please refer to: Configuring Multiple SPF Records
- After the records are added, click Validate Records to ensure all your records were added correctly.
Note: Please allow some time for DNS changes to propagate, as it may take a few minutes to a few hours for the update to take effect across the internet.
Configuring Multiple SPF Records
If your domain has more than one SPF record, follow these steps to merge them into a single, valid SPF record. Having multiple SPF records can cause email delivery issues, so it’s essential to combine them.
- Locate existing SPF records:
- Log in to your domain management platform (e.g., GoDaddy, Namecheap, Squarespace).
- Go to the DNS settings and look for records that start with v=spf1.
- Identify the SPF entries to combine:
- Each SPF record will start with v=spf1 and may contain “include” mechanisms.
- Make a list of all the include domains and mechanisms from each SPF record.
- Combine the SPF records into one:
- Start with v=spf1.
- Add each unique include mechanism from both SPF records.
- End with a qualifier, such as ~all (recommended for soft fails) or ?all (for neutral).
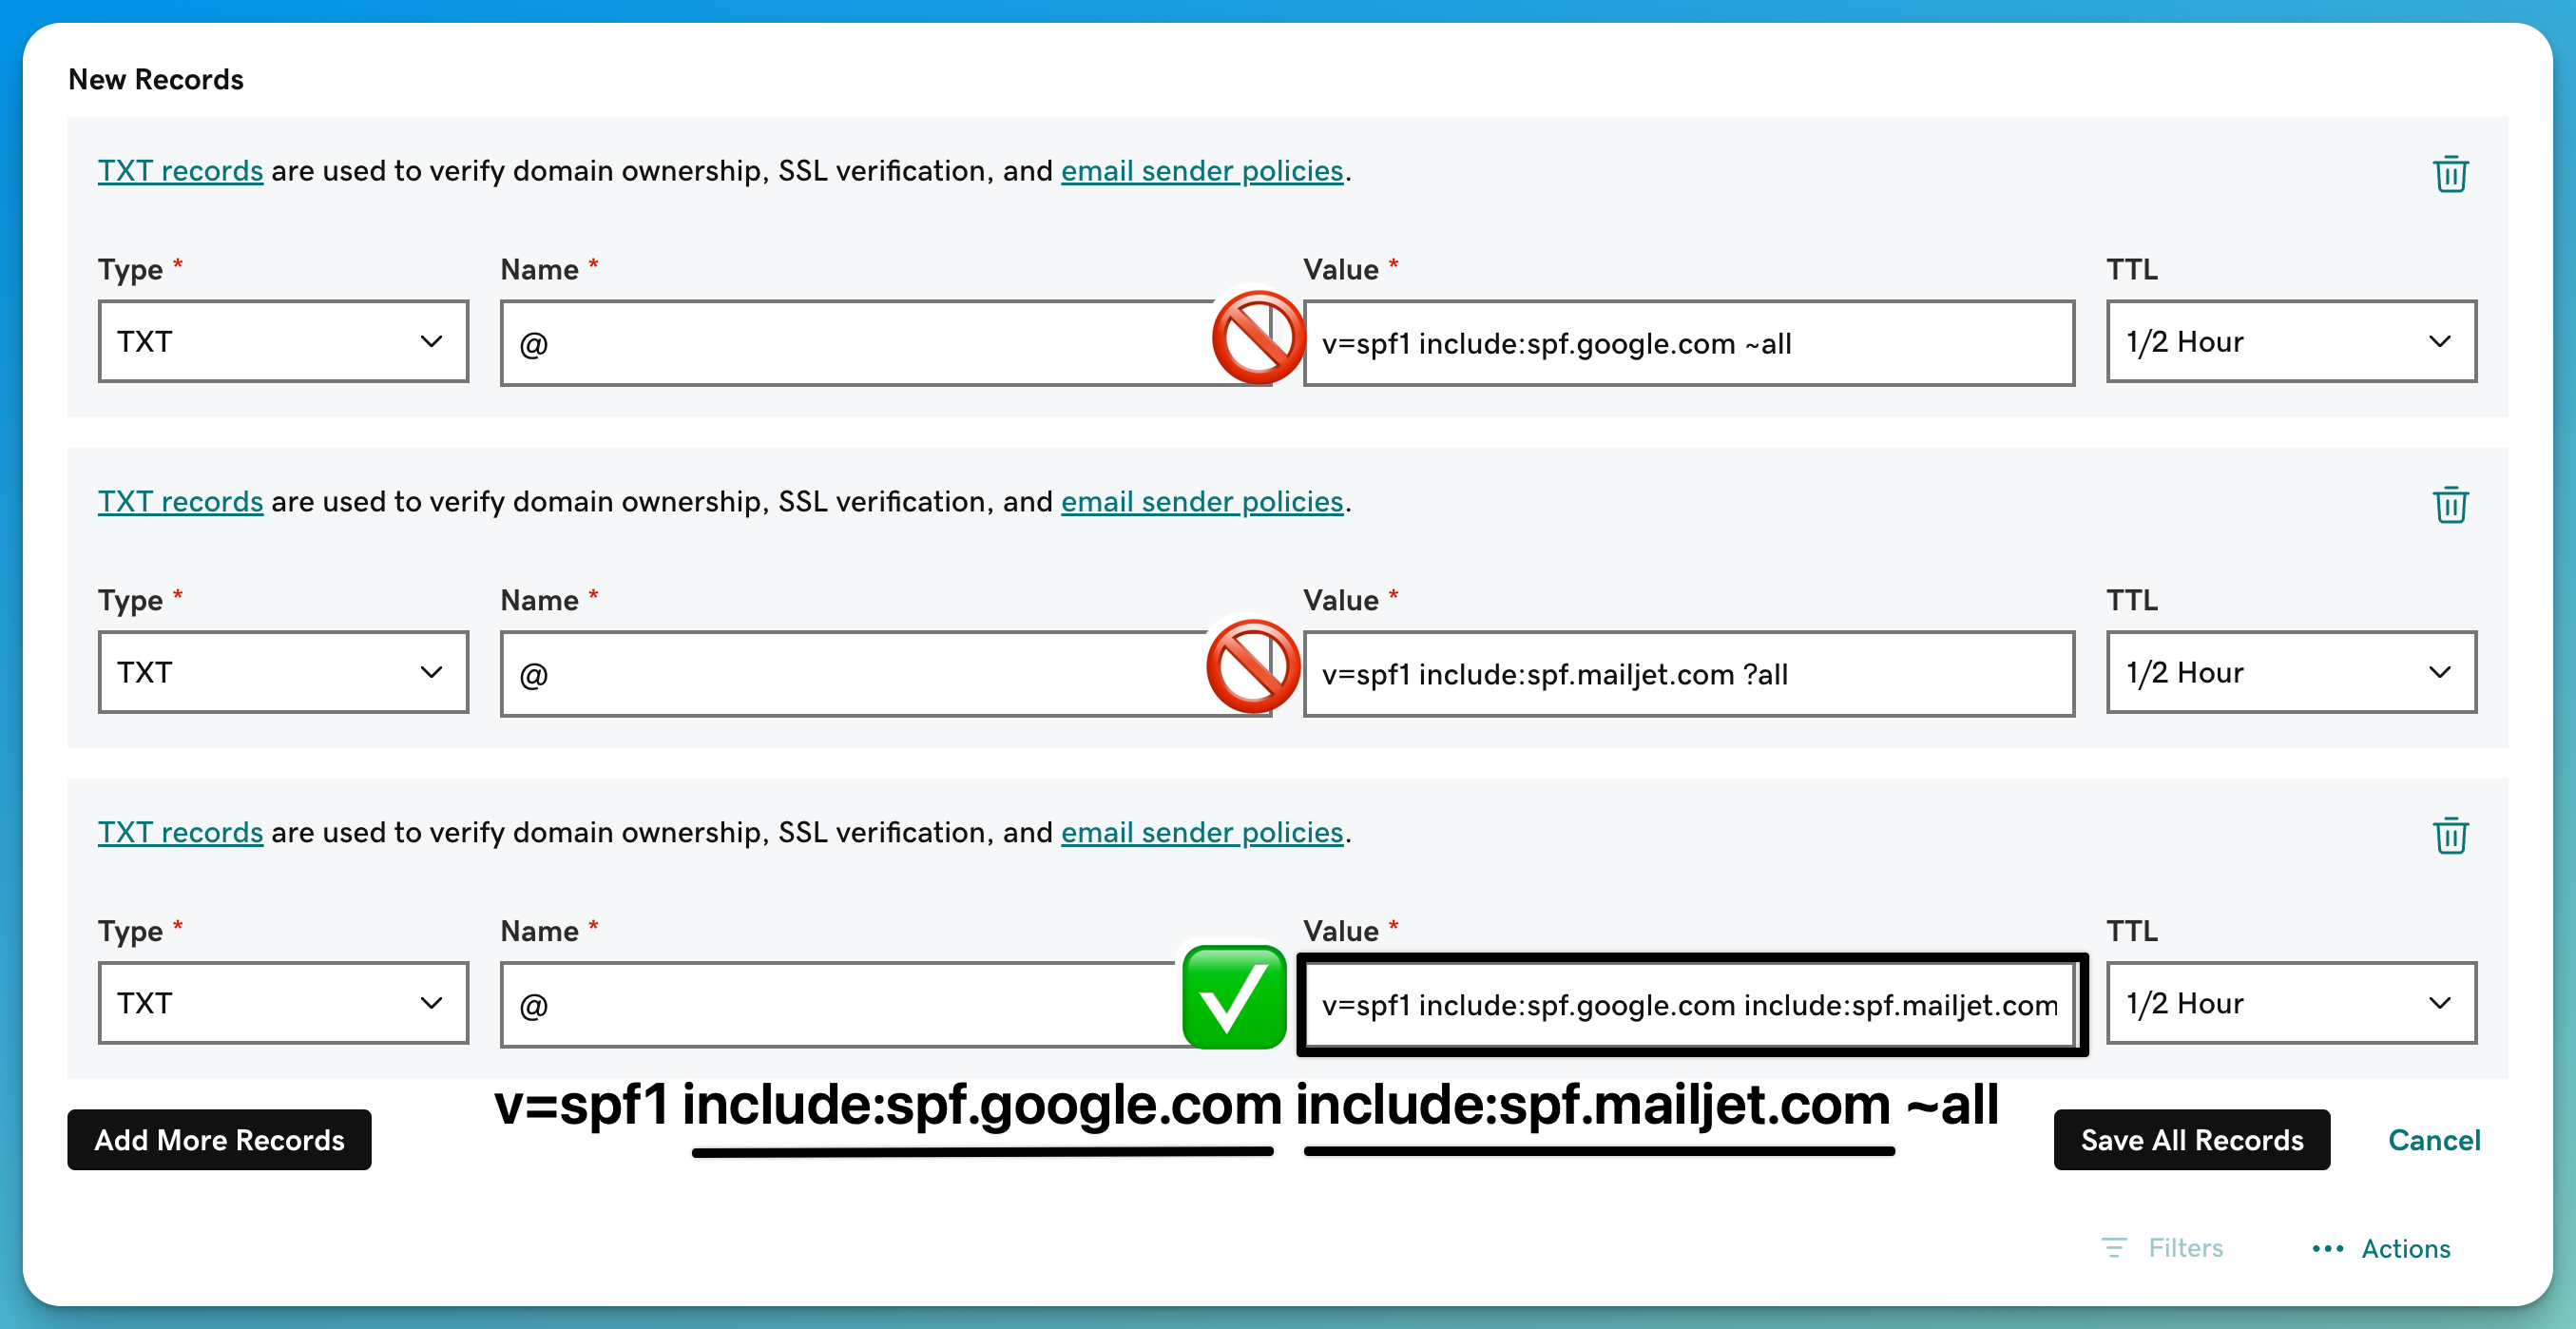
- Example of a combined SPF record:
- If your records are: 1. v=spf1 include:spf.google.com ~all 2. v=spf1 include:spf.mailjet.com ?all
- The combined record should look like this: 1. v=spf1 include:spf.google.com include:spf.mailjet.com ~all
- Replace the old SPF records:
- Delete the original SPF records.
- Add the new, combined SPF record to your DNS.
- Validate the SPF record by clicking “Validate Records” in ToolDesk.
Need Help Updating Your DNS?
If you’d like our team to handle this for you, email [email protected] and add us as the following user type on your domain provider account.
This will give us permission to securely update your SPF, DKIM, and other DNS records for setup.
| Provider | User Type / Access Needed | How to Add |
|---|---|---|
| GoDaddy | Delegate – Products & Domains | How to share access on GoDaddy |
| Namecheap | Sub-Account / Grant Account Access | How to share access on Namecheap |
| Cloudflare | Member with DNS Edit Permissions | How to invite members on Cloudflare |
| Google Domains | Full Access / Transfer to Collaborator in Google Workspace Admin | Manage domain access in Google Domains |
| Squarespace Domains | Contributor with Full Permissions | Invite contributors on Squarespace |
| Bluehost | Collaborator / Grant Account Access | How to grant access on Bluehost |
| HostGator | Primary Account Access (Temporary) | How to give access to HostGator support |
| Wix | Site Collaborator (Owner permissions) | Invite people to collaborate on Wix |
| Shopify Domains | Staff Member with Domain Access | Add staff or collaborators on Shopify |